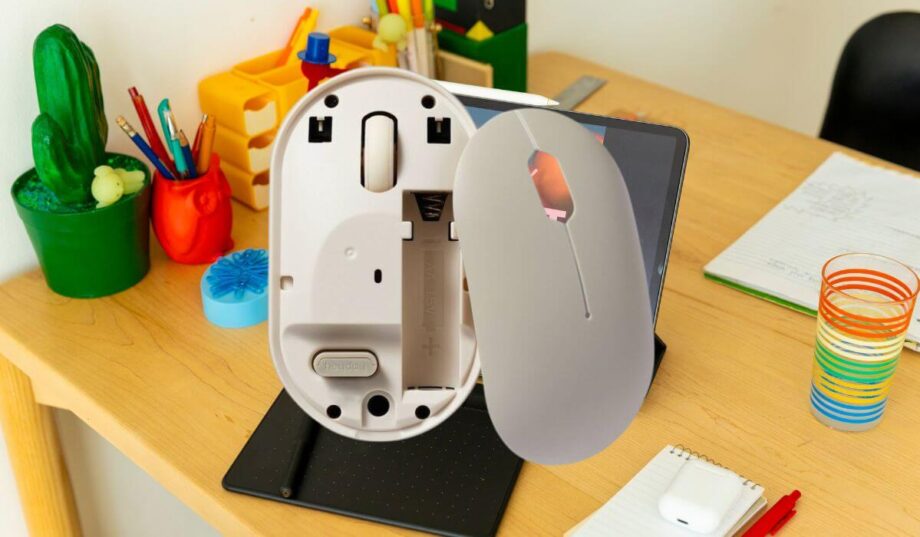
Hello, busy world! Learn how to connect wireless mouse on PC? In just 3 simple methods! Our easy guide will show you how to connect your mouse hassle-free, giving you more freedom and flexibility.
Whether you have a USB or Bluetooth mouse, follow our straightforward instructions to make the most of your device. Enjoy the convenience of a wire-free setup and enhance your computing experience effortlessly. wanna Get started now?
Let’s dive-
How to Connect Wireless Mouse
Before starting, you need to know today’s fast world of computing; here is the breakdown for you-
Windows 11: Go to Start > Settings > Bluetooth & devices > Add device > Bluetooth > Microsoft Bluetooth Mouse > Done.
Windows 10: Go to Start > Settings > Devices > Bluetooth & other devices > Add Bluetooth or other device > Bluetooth > Microsoft Bluetooth Mouse > Done.
On A Mac: Put your wireless mouse into pairing mode, then select the Apple icon, then choose System Preferences > Bluetooth.
How to Connect Wireless Mouse On Your PC: 3 Essentials Methods
Let’s jump to the main part. Are you looking to ditch the cable and enjoy a more wireless experience with your computer? Setting up a wireless mouse on your PC can be a breeze whether you’re using Windows 10 or 11. Here’s a step-by-step guide on how to connect a wireless mouse to your PC, including methods for Bluetooth and USB-RF connections.
Methods For Windows 11
Bluetooth Mouse:
- Turn on your mouse by locating the “On/Off” switch and pressing it.
- Click the Settings icon on your Windows 11 computer, then choose “Devices.”
- Slide the “Bluetooth” slider to the “On” position.
- Click “Add Device” next to “Devices,” then select “Bluetooth” from the list of options.
- Windows 11 will search for available devices. Select your mouse from the list, and it will start connecting.
- Once connected, your mouse is ready to use.
USB-RF Mouse:
- Turn on your mouse by locating the “On/Off” switch and pressing it.
- Plug the mouse’s dongle into your PC’s USB-A port.
- As Windows 11 sets up your device, a toast message will show up in the lower-right corner of your screen.
- A few seconds later, you’ll receive another message stating the setup process is complete. Your mouse is now ready to use.
On Windows 11
To launch the Settings app, press Windows+i. Once in Settings, navigate to “Bluetooth & Devices” from the left sidebar.
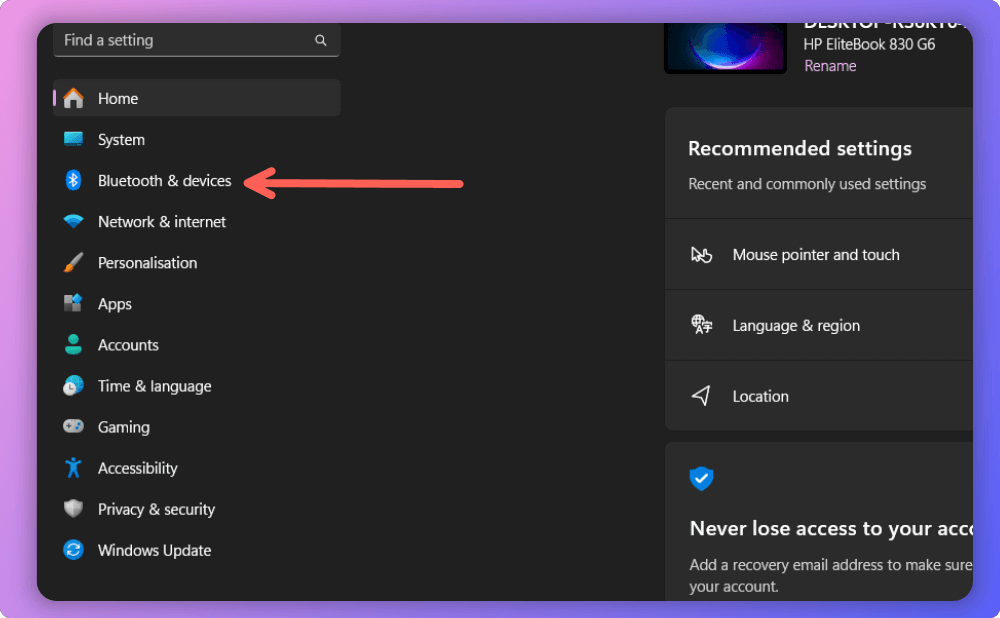
Activate the “Bluetooth” option by switching it on in the right panel. Next, choose “Add Device” located below the toggle switch.
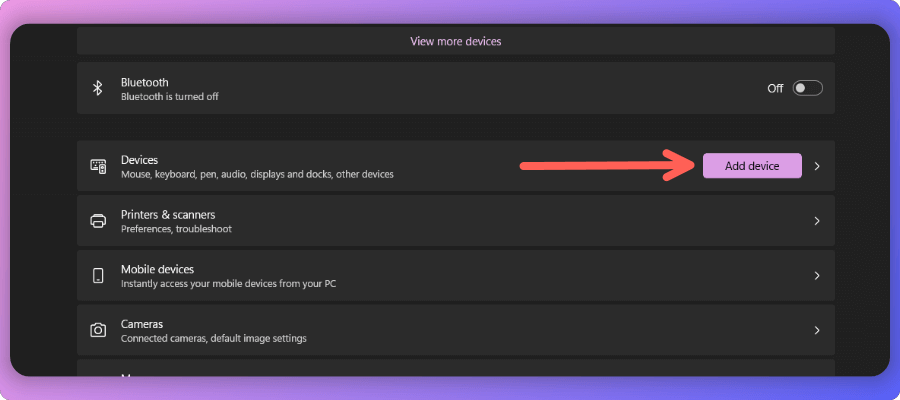
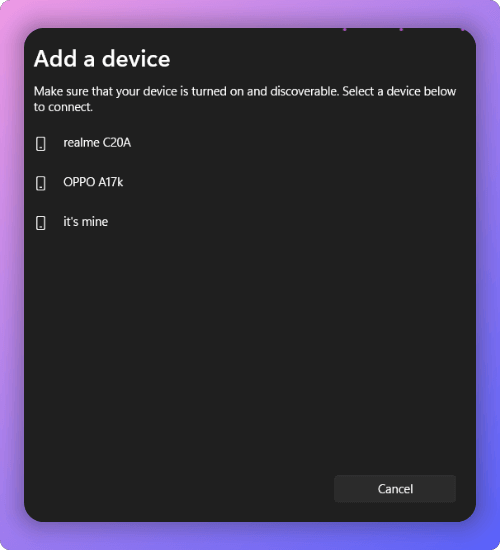
Click on the “Add a Device” button and choose “Bluetooth.”
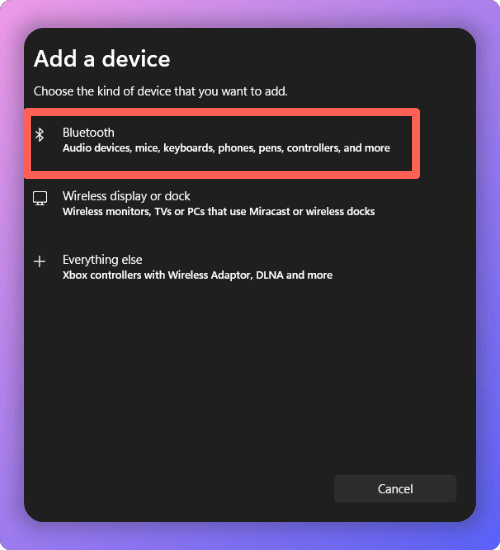
Press and hold the pair button on your mouse to switch it into pair mode (you can locate this button on the back of the mouse). Next, choose your mouse on the “Add a Device” window.
Methods For Windows 10
Bluetooth Mouse:
- Turn on your mouse by locating the “On/Off” switch and pressing it.
- The Windows key + I will open the Settings app. Next, select “Devices.”
- Slide the “Bluetooth” slider to the “On” position.
- Click “Add Bluetooth or other device” next to “Devices,” then select “Bluetooth” from the list of options.
- Windows 10 will search for available devices. Select your mouse from the list, and it will start connecting.
- Once connected, your mouse is ready to use.
USB-RF Mouse:
- Turn on your mouse by locating the “On/Off” switch and pressing it.
- Plug the mouse’s dongle into your PC’s USB-A port.
- As Windows 10 sets up your device, a notification will appear in the lower-right corner of your screen.
- A few seconds later, you’ll receive another notification stating the setup process is complete. Your mouse is now ready to use.
Methods For Mac
Bluetooth Mouse:
- Turn on your mouse by locating the “On/Off” switch and pressing it.
- Click the Apple icon located in the upper-left corner of your Mac, then select “System Preferences.”
- Click “Bluetooth.”
- Turn on Bluetooth by sliding the slider.
- Your Mac will search for available devices. Select your mouse from the list, and it will start connecting.
- Once connected, your mouse is ready to use.
On Mac
Click the Apple logo in the upper-left corner of your Mac, then select “System Preferences.” Next, choose “Bluetooth.”
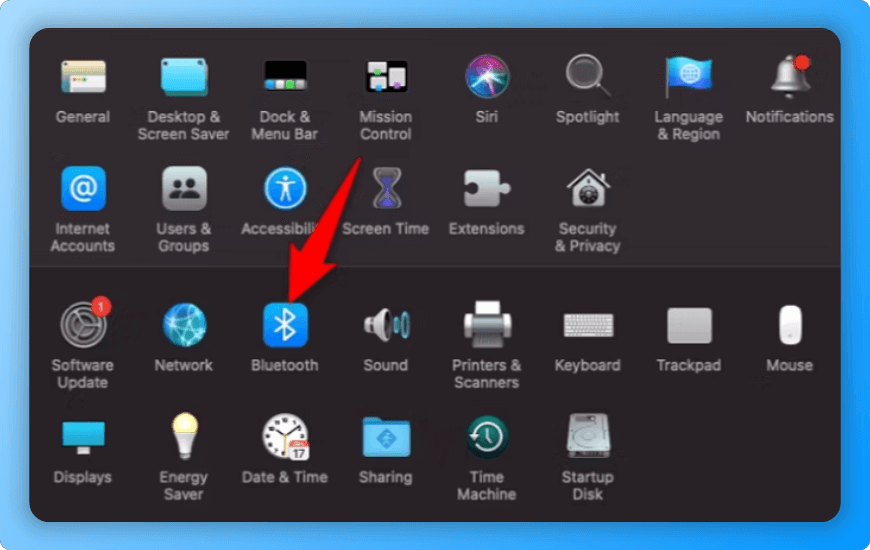
If the feature is not enabled, click “Turn Bluetooth On” from the “Bluetooth” screen. If it’s enabled already, there’s nothing more for you to do.
Next, enable mouse discovery by tapping and holding the muse’s pair button. Right-click the mouse on your Mac and choose “Connect.”
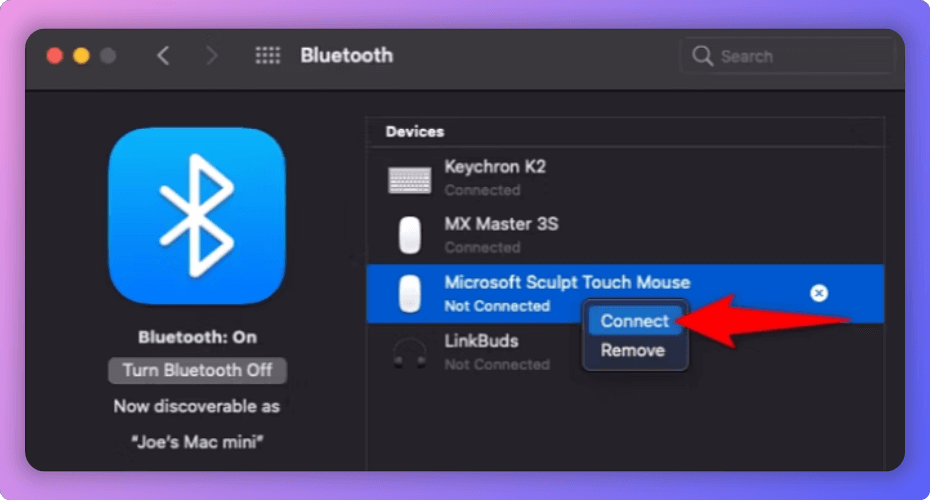
You can use your newly added device to move your cursor once your Mac and mouse are connected. And you are ready to go.
Final Thought
Remember, whether you choose a Bluetooth or USB-RF mouse, setting up a wireless mouse on your PC or Mac is a simple process that can enhance your computing experience. So, why ditch the cable today and enjoy a more wireless, efficient workspace? When talking about “how to connect wireless mouse to a PC,”. This is all you have to know.


